For Jnr Pink's 1st birthday I decided to throw a Teddy Bear's Picnic themed party, so of course I had to make a teddy bear cake! (Ok, you got me, I may have decided on the cake first and then found a theme to match just so that I could make a teddy cake!)
First I was looking at buying a teddy cake tin but then I saw THIS and the challenge was laid down.
Once again I am going to ignore the 'quick and easy' tagline of this blog for this particular one, but its a freakin teddy bear cake, I mean c'mon, I couldn't not do it!
I'm going to skip the actual making of the cake and icing, but they are all mudcakes (mudcake was the only dense and strong enough cake I could think of to withstand the massive weight required to construct the teddy). The body was a combination of made and bought chocolate mudcakes, and the head was made from my white chocolate mudcake recipe.
So, what you need then...
- 7 mudcakes. (I made them in the week leading up to the birthday party, another reason to use mudcake - it lasts really well)
- chocolate ganache (equivalent of covering about 3 cakes)
- white chocolate ganache (enough to cover one full cake -inc. sides)
- toothpicks
- 2 chopsticks
- round cookie cutter
- lots of butter
- lots of icing cusgar
- fondant icing (I bought a ready made packet)
- brown food colouring
- 2 maltesers/chocolate bullets/something to use as eyes
- 1 chocolate coin or something similar, or better yet, a chocolate triangle of some kind!
Method:
Step 1: Layer 3 of the chocolate cakes one of top of the other using the chocolate ganache as glue to hold them together and pierce them with the chopping sticks to firmly hold them in place.
Use a large knife to cut at an angle on the top 1 and a half cakes to create a more 'body' like shape. Note that you don't want to make it too small a circle on the top because the head still has to have enough support under it when you place it on.
Step 3: Scrunch up some of the leftover scraps from when you shaped the top 2 cakes on the body into cylinders / balls (whatever works best for you, I tried for cylinders but ended up with more like balls - you can fix the shape with the first layer of buttercream icing anyway!)
Step 4: I found the the angle I cut the top cake of the body at, left me with 2 perfectly shaped arms for the teddy bear. If you don't get this though, you could potentially use the same cake as the feet to sculpt feet and arms out of if you fiddle with the sizes of each.
Step 5: Use toothpicks to attach the arms to the body of the teddy - use as many as you need, just remember they're there when you are cutting up and serving the cake!
Step 6: Use white chocolate ganache to glue the white chocolate mudcakes together. Using a large knife, sculpt the two cakes into the shape of a head - remember, less is more! Don't go mad and cut too much off too early or you'll be left with a teeny tiny head!
Step 7: From the off cuts of the head, use the round cookie cutter to cut out 2 ears for the teddy, and a nose.
The ears can be made from edges that have an edge to them already - this will help them be placed onto the head.
I cut the nose from a curved offcut of cake, so that it could sit against the head better.
Step 8: Use toothpicks and ganache to attach the ears and nose, cutting them as necessary to fit snugly against the head.
Step 9: At this point it was late at night so I wrapped the teddy up in cling wrap for the night so that I could get some sleep, and continued bright eyed in the morning.
Step 10: Make a heeeeap of buttercream icing, I can't remember exactly how much I did, but probably enough to cover about 5 normal cakes (inc. sides). If you need more, just make more. And if you have too much (unlikely) you can eat it!
Use a dash of brown food colouring so that the underneath layer of icing doesn't stand out toooo much (admittedly, mine probably wasn't brown enough but I couldn't be bothered at the time to make it browner!). Cover the teddy in the buttercream icing, filling in the gaps where necessary (e.g. leg and foot joins).
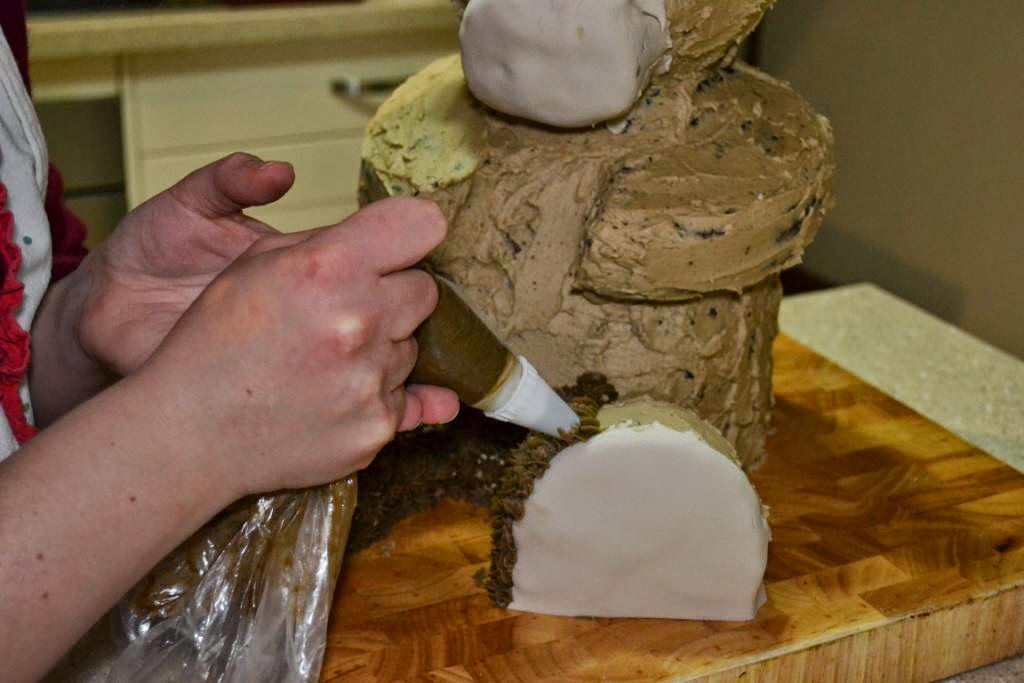
Step 11: Roll out the fondant icing and knead a small amount of brown food colouring through it. Cut it into required shapes to cover the pads of the feet, the inner ears and the nose.
Step 12: Mix up about the same amount of buttercream icing again (this time I made it a darker brown) to make the teddy's fur. Using a large star shaped piping end (as starry/pointy as you can get) pipe the icing onto the bear, starting at the bottom and working your way up.
Step 13: Once you've piped the entire bear, press the maltesers onto the teddy as eyes, and use the left over icing to glue the chocolate triangle onto the nose. Using a sharp knife, score from the point of the nose down to the chin/neck of the bear.
And Voila! You have yourself a teddy bear cake!


You are amazing!! I still have to find the courage to try something like this.
ReplyDelete