Friday, July 15, 2011

Pear & Strawberry Crumble


I've had this one in mind for some time now, but as Mr & Mrs Killer told me they don't like pears/strawberries, I've had to wait until there was an occasion to make it for others. Last week, that time arrived; Mr Pink's family came over for dinner. It went down really well, and I would definitely be happy to make this one again.

This was really easy and didn't take too long to make, less than 30min.

Serves 6

Ingredients:
 - 1 cup caster sugar
 - 1 cinnamon stick
 - 1 vanilla bean, split, seeds scraped
 - 6 pears, peeled
 - custard to serve
 - icing sugar to dust

Strawberry Crumble
 -  30g butter
 - 1 cup Apricot, Date ^ Almond Muesli
 - 1/4 cup brown sugar
 - 1 cup fresh strawberries, chopped


Method:
Step 1: Place 4 cups of water in a large saucepan with sugar, cinnamon stick vanilla bean and seeds. Simmer on medium heat for 10 minutes.

Step 2: Add pears, reduce heat to low and simmer, covered, for 10-15 minutes, or until tender.

Step 3: Meanwhile, melt butter in a frying pan on medium heat. Add muesli and sugar and cook, stirring, for 5 minutes or until golden.

Step 4: Add strawberries and cook for 2 minutes or until strawberries are soft.

Step 5: Remove pears from syrup and cut in half. Place in serving bowls and top with strawberry crumble mixture. Serve with custard and dust with icing sugar.
Note to eaters: Its perfectly okay to leave the core of the pear as they can be a bit sour and you don't want to ruin the taste of the dessert!

Zabaglione Pastry Horns

This is one I saw months and months ago but I couldn't make because I didn't have the pastry cones. But then, one day, I was out shopping with Mrs Killer and I came across some pastry horns! Mrs Killer can attest to my excitement when I came across them, but trust me, it was great! :-)

Its quick-ish IF you make the pastry horns the night before, which I did. Making the zabaglione itself is easy but does require a fair amount of muscle, luckily I had 3 other people whose muscles I took avantage of.

And now, from the cooking genius of James Reeson, I give you, ZABAGLIONE PASTRY HORNS.

Makes 16 pastry horns, Serves 3-6 people depending on how hungry they are!

Ingredients:
 - 6 egg yolks
 - 3 tbsp caster sugar
 - 3 tsp Marsala (a dessert wine used mostly for cooking, for those of you who have never heard of it - yes, I was one of you)
 - 2 sheets puff pastry
 - canola oil spray

Method:
Step 1: Cut pastry sheets into 2cm strips.


Spray metal pastry horns with canola oil. Wind the puff pastry strips around the cone, from bottom upwards. Gently press the top part of the pastry down to seal. Tip: don't make the end stick out too much as it makes it harder to put the zabaglione in later.


Step 2: Place pastry horns onto a lined baking tray and into a preheated oven at 200degreesCelcius for 11-14 minutes, until golden brown.Remove from metal horn and allow to cool.
Note: You'll have to do it in batches unless you buy 16 or so pastry horns!


Step 3: Place egg yolks into a large mixing bowl and whisk until light and fluffy.


Step 4: Place your mixing bowl over pot of warm water (about75degreesCelcius, just below simmering) and continue whisking for 5 minutes adding half the sugar.
Note: This is the start of the hard bit....get your muscles ready

Step 5: Sprinkle in a little more of the sugar and continue whisking for a further 5 minutes.


Step 6: Sprinkle in the remaining sugar and whisk again for 5 minutes.

Step 7: Add the Marsala a teaspoon at a time, whisking as you go.


Step 8: Pour the zabaglione into a cool bowl.
 tep 9: Place 2 blueberries into the bottom of the pastry horn, put a tablespoon or so of the zabaglione into the pastry horn and top with a strawberry.


Step 10: Dust with icing sugar and serve!

Apple & Pecan Crumbles


This is my very first microwave dessert attempt and is one I picked up from our local fruit shop. It is marketed as a great idea for kids so you know its quick, easy and impossible to get wrong! ... Except that I may have gotten it wrong... a little. :-) But it was still really yummy, just possibly not the right texture.

Serves 6

Ingredients:
Apple mixture
 - 8 green apples, peeled, cored and chopped
 - 1/4 cup caster sugar
 - 1/4 cup water
 - 1/2 cup sultanas

Pecan mixture
 - 1/2 cup plain flour
 - 1/4 cup brown sugar
 - 1/2 tsp ground cinnamon
 - 75g butter, chopped
 - 1/2 cup pecan nuts, chopped
 - 1/3 cup shredded coconut

Method:
Step 1: Combine apples, caster sugar and water in a large microwave safe dish.

Cover and microwave on high for 12-15 minutes, stirring every 5 minutes until golden and very tender.
This is where I think I went wrong... I did it for a full 15 minutes and the apples were so 'tender' that they turned to mush. If you don't like mushy baby-food apples, maybe try for 10 or so minutes! 

Stir through sultanas and set aside to cool for 10 minutes.

Step 2: Preheat oven  to 180degreesCelcius.

Step 3: Meanwhile, to make pecan crumble topping, place flour, brown sugar and cinnamon in a bowl.

Rub in butter until mixture resembles coarse breadcrumbs.

Mix in pecan nuts and coconut. (Note: if you have a very keen eye, you'll notice that there is no coconut in the pictures.... thats because I forgot to add it in! Whoops! It was still good though, even without the coconut)


Step 4: Spoon apple mixture into 6 x 3/4cup-capacity ovenproof dishes or tea cups (I used ramekins). Sprinkle with crumble topping and place on a baking tray.


Step 5: Bake 20 minutes or until topping is golden. Cool slightly and serve.
I like to serve it with icecream and custard, and ramekins aren't terribly good for doing that, so I ended up turning it out into a bowl which ruins the crumble top, but its easier to eat and still tastes the same ;-)

White Chocolate Mudcake


I made this for my birthday cake (yes, for those of you who know when my birthday is, it was some time ago now, I know, give me a break, I've been busy!... but mostly lazy ;-)  ) and it was a superb choice if I do say so myself! ;-)

Serves: 16 (or less depending on portion sizes of course! For instance, it would only provide 8 of what I call 'Dad' slices)
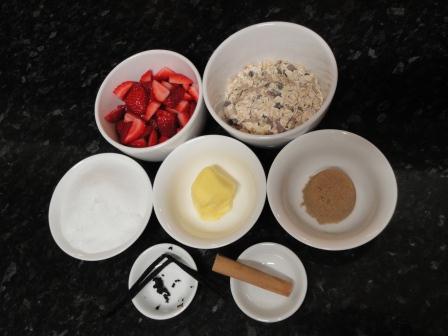
Ingredients:
300g white chocolate
200g butter
1 cup milk

3/4 cup caster sugar
2 teaspoons vanilla extract
2 large eggs, lightly beaten 

2/3 cup self-raising flour
1 cup plain flour

Sour Cream & White Chocolate Ganache (topping)
200g white chocolate
88g sour cream
 

Method:
Step 1: Preheat oven to 145degreesCelcius (160 for conventional)

Step 2: Line base and sides of a 20cm round cake tin with baking paper (I don't know if I'm the only one who does this, but I like to either wipe butter on the tin or spray it with non-stick cooking spray, so that the baking paper actually sticks to it and stays in place). Alternatively, if you (like me) don't want to go to that much effort (can't be bothered) I like to use a silicone cake 'tin' with a light spray of non-stick oil spray.

Step 3:  Place chocolate, butter, milk and sugar in a large saucepan over low heat stirring frequently.

Once butter and chocolate have melted, remove from heat and stir until completely smooth. (Note: I started with rock hard utter, so decided to try and soften it in the microwave... well long story short it was already alf melted when I started, so this step didn't take long! The point is, its not the end of the world if the butter is melted when you put it in...)

Set aside and let it cool at room temperature for 15min.

Step 4: Add vanilla and eggs to chocolate mixture and stir until well combined.

Step 5: Sift flours together in a large bowl. Now the original recipe says to add one cup of chocolate mixture to the flour and stir until a paste forms, in order to prevent lumps... The first time I made this, thats what I did and what did I get? Lumps. So the second time I made it, I added a bit of the chocolate mixture, gave it a stir, added a bit more, stirred and so on. And, what do you know, no lumps.


Step 6: Pour into prepared cake tin and then bake for 1 hr 10min to 1hr 20min (knife inserted into centre will come out clean when its ready).

Step 7: Lick bowl and saucepan clean (unsurprisingly, this is my favourite step...)

Step 8: Loosely cover cake with greaseproof paper or a clean tea towel and allow to cool to room temperature in pan.


The Ganache. So its well known that I am not exactly a fan of sour cream, and I admit I was rather sceptical of putting a sour cream based icing onto my birthday cake for fear I wouldn't like it. But. Gosh was it gooooood :-) So for all my fellow sour cream dislikers, don't worry, it doesn't taste like sour cream.

Step 9: Melt chocolate in a small saucepan over very low heat, stirring frequently. When chocolate has completely melted, remove from heat and stir in sour cream. Use immediately, or if your ganache is quite runny, set it aside at room temperature to thicken slightly before using.


Bonus: I made some (oddly shaped) chocolate freckles to decorate the cake with; just melted some milk chocolate, poured it into a foil-lined container, poured hundreds & thousands over it and left it to set at room temperature. Easy & yummy!

Monday, April 18, 2011

(Purple) Vanilla Pudding


It was Mr Pizzaman's last Friday Night Pizza Night with us before moving to Perth, and I asked him for his final dessert request. He said "something purple". Yes, he is one of those people who like to be 'difficult'. But, he made us pizzas so he got away with it! ;-)

I couldn't think of anything to do, so I resorted to food colouring. Vanilla pudding with a couple drops of red and blue dye and viola! Purple dessert!

So, this one was my Farewell Dessert to a wonderful pizza chef that will be sorely missed.

Ingredients: Serve 4
- 1/2 cup sugar
- 2 tbsp cornstarch or riceflour (I used the latter because I was all out of cornstarch)
- 1/8 tsp salt
- 2 cups milk
- 2 egg yolks, slightly beaten
- 1 tbsp margarine or butter
- 1 tsp vanilla
 - And if you happen to have a difficult customer who requests 'purple' desserts,  red & blue food colouring

Method:
Step 1: In a medium saucepan, combine sugar, cornstarch/riceflour and salt. Gradually stir in milk.

Step 2: Cook over medium heat until mixture boils and thickens, stirring constantly. Boil 1 minute.

Step 3: In a small bowl, stir about 1/3 of hot mixture into egg yolks.


Stir yolk mixture into hot mixture; blend well. Cook until mixture bubbles, stirring constantly. Remove from heat; stir in margarine and vanilla.
Note: this is the point that one would add food colouring if they so wished...

Step 4: Serve into separate dessert bowls. Cool for 15 minutes before serving.

Berry Sorbet


I needed a quick easy and somewhat healthy dessert (because I was feeling guilty about eating bad food for the previous few days!) and I came up with this one.

Very easy, and pretty darn healthy for a dessert. But requires more time than I gave it originally... The recipe suggested 2hrs in the freezer, I had to give it several days.

Ingredients:
- 2 cups strawberries
- 2 cups blueberries
- 1/2 cup water
- 1/2 cup sugar
- pinch of salt

Method:
Step 1: Put all ingredients into a food processor. (Yes the photo has them in a blender, but trust me, this does not work. Well, at least when you're using frozen berries like I was. Use a food processor!) Puree until smooth.

Note: Because I used frozen berries, I think I probably added too much water to the mixture which may have contributed to the freezing difficulties...

Step 2: Pour the berry mixture through a sieve into a freezer-safe container. This step can take a bit of effort depending on how fine a sieve you use... probably took me about 5-10min to do completely.

Step 3: Freeze for apparently 2 hours but in reality more like 2 days (after 3hrs it was still runny so I left it for a few days to make sure it froze). Even then I found that it was a bit icy - don't get me wrong, still good and yummy, but a bit icier than its probably meant to be.

Traditional Dutch Poffertjes


I know I said Sticky Date Pudding was my absolute favourite... But really Poffertjes (poff-et-yers) are really truly my absolute all time favourite dessert EVER!

Up until now I've cheated and made pancake-pofferje hybrids using a pancake mix. But we had a Harmony Day celebration at work where we all brought in traditional food from different countries and I took the opportunity to do it right.

One of the best presents I have received (and I've received many great ones) is a poffertje maker machine (shown in the photos below), but if you don't have one of these you can use a normal fry pan and just get flatter - but just as yummy - results.

Ingredients:
- 1 level tsp instant yeast
- 1 tbsp milk
- 1 cup buckwheat flour (can be found in most health food stores)
- 1 cup plain flour
- 2 eggs
- 1 tsp sugar
- 1/2 tsp salt
- 1 1/4 cups warm milk
- 1 tbsp butter

And a 'good' quantity of butter and icing sugar to serve

Just a note on quantity: I made a double batch and it turned out to be this many...
So one batch would happily do 4 people for a dessert

Method:
Step 1: In a small bowl, dissolve the yeast in milk.

Step 2: In a separate bowl, combine the buckwheat flour, flour, eggs, yeast, sugar, salt and half the milk. Whisk until smooth.

Step 3: Add the remaining milk and beat again.

Step 4: Cover the bowl with plastic wrap and allow to rest for an hour.

Step 5: Spray pofferje maker machine with cooking oil or melt butter in each whole (be careful if using butter because I often find the butter burns and then ruins the poffertje) Alternatively if you don't have a poffertje machine, put the oil/butter into a frying pan.

I use a sauce squeezey bottle to squeeze the mixture out as its easier and less messy than trying to use a teaspoon. Having said that, if you don't have an empty sauce bottle, a teaspoon would work fine!

Step 6: Just like pancakes, turn the poffertjes around as soon as the bottom has set. I suggest sticking a fork into the edge of the poffertje and quickly flipping it over. I have used toothpicks in the past but I think forks are easier.

The poffertjes are done when they are a nice light golden brown


Step 7: Serve. Poffertjes are best served hot/warm, so plate them up asap! Put a generous amount of butter with them and then sprinkle/cover with icing sugar.

Hot Cross Buns


I made these in early March... a little early for the Easter festivities maybe, but I do love my hot cross buns and I was excited :-)

Not so quick but it is fairly easy to make if you've got some time up your sleave.

Ingredients: Makes 16
- 1/3 cup caster sugar
- 4.5 tsp dry yeast
- 1 1/2 cup warm milk
- 600g plain flour
- pinch salt
- 1 1/2 tsp ground cinnamon
- 1/2 tsp mixed spice
- 60g butter, chopped
- 1 egg, lightly beaten
- 2/3 cup sultanas

Paste for crosses
- 1/2 cup plain flour
- 4 tbsp water
- 2 tsp caster sugar

Glaze
- 1 tbsp very hot water
- 1 tsp gelatine powder
- 1 tbsp caster sugar

Method:
Step 1: Combine caster sugar, yeast and milk in a bowl, stir until smooth, cover and rest in a warm place for 10min or until frothy. Its a little hard to see in the photo but the one on the right is frothy...

Step 2: Sift flour, salt, cinnamon and mixed spice into a large bowl. Use your fingertips to rub butter into the flour mixture - be warned, this is tiring! My fingers start to ache after a minute or two, and there seems to be a never-ending supply of butter that needs to be rubbed in! But stick with it, you'll get there... eventually!  And then you'll end up with something like this:

Step 3: Stir in yeast mixture, egg and sultanas until well combined. Cover and rest in a warm place for 45 minutes or until mixture has doubled in size.


Step 4: Preheat oven to 220degreesCelcius.

Step 5: Turn dough onto a lightly floured surface and knead until smooth and elastic (about 5min). Divide dough into 16 even pieces and roll into balls. Place balls into a lightly greased square cake pan lined with baking paper. Rest covered for 10-15min or until balls have risen to the top of the pan.

Step 6: Combine paste ingredients in a small bowl and, using a piping bag or a sandwich bag with the corner snipped off, pipe crosses over the buns.

Step 7: Bake for about 20minutes or until well browned and cooked. Combine glaze ingredients in a small bowl and stir until sugar is dissolved. Brush buns with warm glaze and cool on a cake rack.

Mrs Pinks' little piece of advice: if you're planning on packing your hot cross buns into a container for storage or transport, I would consider holding off on the glaze. Once you glaze them, the buns become quite sticky and will stick to each other or whatever else they touch.